

 Tweet
Tweet
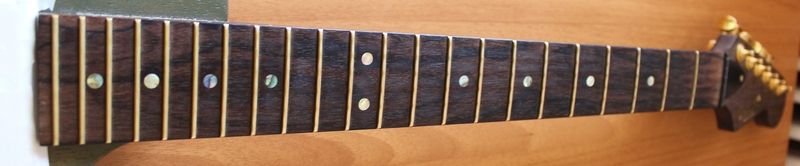
I decided it was time to clean the fretboard of my number 1 today. I have put in between 3 to 5 hours a day on this guitar for the past 7 years now. As you could imagine, the fretboard built up some dirt and "skin wax" over the years so it was time to do another cleaning. This is a ziricote fretboard. Here is how it looked before I used the #0000 steel wool to rub away the grime:
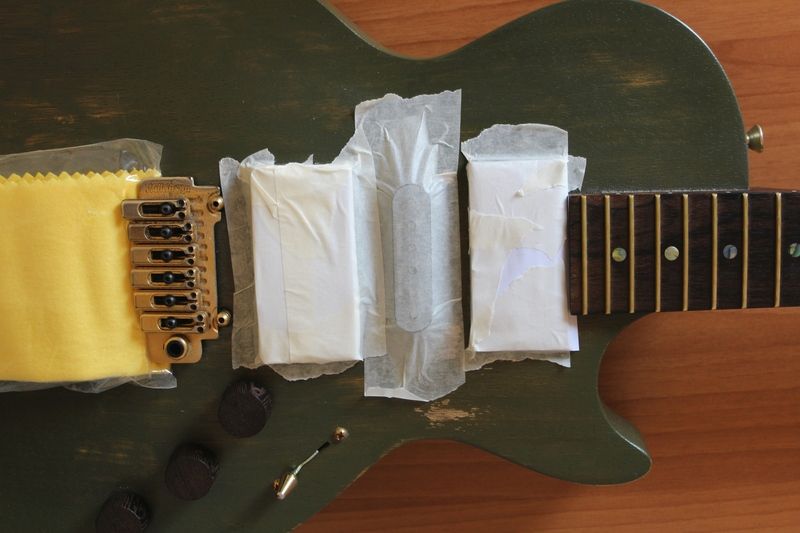
Ok, the first step when using steel wool to clean the fretboard of an electric guitar is to mask off the pickups or else the magnets will draw in all the metal shavings that come off the steel wool. You may not mind if this happens as far as the looks are concerned but ideally you want to keep the shavings out of the pickups to prevent any potential problems. I used a combination of paper and masking tape. I sealed the paper on the humbuckers with the masking tape on the edges of the humbucker rings and just used a large piece of making tape over the STK-S4 stacked single coil:
From here I took a small wad of the #0000 steel wool and gently rubbed in between each fret. I use #0000 steel wool which is the finest grade available for this. If you are going to do this, always rub with or along the grain of the wood. Do not go against the grain. You can obviously go over the frets with the steel wool as well to polish them a bit but again, keep it with the grain! I did this for each fret. Then, I went over it all once more with an emphasis on making sure I used my fingertips pressing against the steel wool (gently) to really get the grime leading up to the edge of each fret as much as possible.
After I had done this, I used my vacuum to clean up all the metal shavings around the work area. I also hovered the vacuum over the neck, body and masked off pickups to get as many of the shavings as possible without touching the guitar with the vacuum. I grabbed a soft cloth I had dampened with water to gently dab each fret to make sure I got any metal shavings left behind by the vacuum.
Finally, I used a fretboard conditioner to finish the job before restringing. I tried to wait as long as possible after applying the conditioner to take the after photos but I was running out of daylight. Here are some after photos:

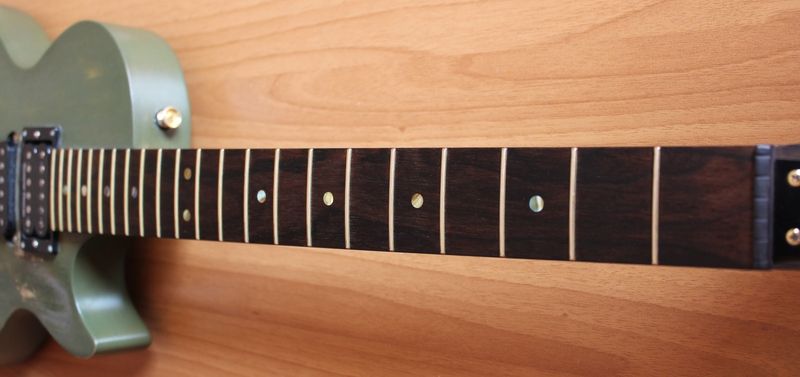
Pretty easy. Should remain this way for another year or two (maybe longer this time as I have already ordered the body for what may become my new number 1 guitar if all goes well).
Ok, the first step when using steel wool to clean the fretboard of an electric guitar is to mask off the pickups or else the magnets will draw in all the metal shavings that come off the steel wool. You may not mind if this happens as far as the looks are concerned but ideally you want to keep the shavings out of the pickups to prevent any potential problems. I used a combination of paper and masking tape. I sealed the paper on the humbuckers with the masking tape on the edges of the humbucker rings and just used a large piece of making tape over the STK-S4 stacked single coil:
From here I took a small wad of the #0000 steel wool and gently rubbed in between each fret. I use #0000 steel wool which is the finest grade available for this. If you are going to do this, always rub with or along the grain of the wood. Do not go against the grain. You can obviously go over the frets with the steel wool as well to polish them a bit but again, keep it with the grain! I did this for each fret. Then, I went over it all once more with an emphasis on making sure I used my fingertips pressing against the steel wool (gently) to really get the grime leading up to the edge of each fret as much as possible.
After I had done this, I used my vacuum to clean up all the metal shavings around the work area. I also hovered the vacuum over the neck, body and masked off pickups to get as many of the shavings as possible without touching the guitar with the vacuum. I grabbed a soft cloth I had dampened with water to gently dab each fret to make sure I got any metal shavings left behind by the vacuum.
Finally, I used a fretboard conditioner to finish the job before restringing. I tried to wait as long as possible after applying the conditioner to take the after photos but I was running out of daylight. Here are some after photos:
Pretty easy. Should remain this way for another year or two (maybe longer this time as I have already ordered the body for what may become my new number 1 guitar if all goes well).


Comment