I need help Installing a Seymour Duncan SH-4 JB Model Humbucker!!!

quintaar69

New member
Hey everyone,

Just bought a Seymour Duncan SH-4 JB Humbucker (Bridge).

I really need some help installing it correctly. This is the first time I've ever changed a pickup.

My guitar is an Ibanez GRG131DX. It has 2 humbuckers.
Infinity R (H) neck pickup Passive/Ceramic
Infinity R (H) bridge pickup Passive/Ceramic

20221211_032206.jpg


ATM, I only bought one humbucker for now. The bridge.
a Seymour Duncan SH-4 JB Humbucker (Bridge).
I will add some pics. My main problem..is what wire goes where.
The colored wires got me all screwed up.
Pink is the neck
Green is the bridge. I clipped the green.


These are from my Ibanez:

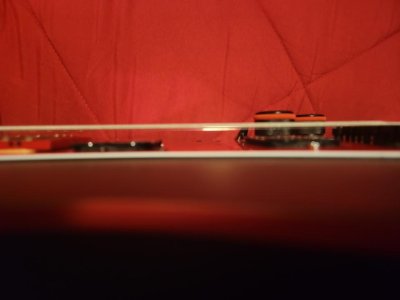
This is before I cut the green. The pink wire is connected to the bottom of this board. Which is the switch selector.

20221211_040506.jpg 20221211_040531.jpg 20221211_040559.jpg


This is after I cut the green wire.
20221212_185423.jpg


This is the SH-4 JB Humbucker (Bridge)

20221211_040604.jpg 20221212_185833.jpg

Ive watched video's, looked at the Seymour Dunken wire diagrams...bunch of stuff.
Even the diagram that came with the pickups.
Problem for me is.......they all talk about soldering the wires or some of them to the Pots.
That is not my situation as you can see.

This is also the first time I've ever soldered. I can't get the damn stuff off, to put new solder on with the wires.
Look at the pics......did I screw the board up?
If not.....do I just leave it...and put the wires on it and melt it?????
Or do I remove the old solder? And if so...how the hell do I remove it??
I have 2 different solder suckers. They seem lame to me.

20221216_104340.jpg 20221216_104331.jpg 20221216_104309.jpg


Did I screw it up yet??


Please help Guys!!!
 
Hopefully you didn't burn up your board. Do you have a damp sponge to wipe off your soldering iron? Let your iron heat up fully. Wipe it clean on the sponge so it looks silvery and shiny. Add a tiny bit of solder (ideally 60/40, rosin core) and pre-tin all of the pickup wires (twist the red and white wires together first and solder them together). Only use enough solder to make the wires shiny, do NOT put globs of solder on them.

On the circuit board, heat the lug marked "HOT" until the existing solder melts and immediately place the pre-tinned black wire from the JB on the lug and heat it until the solder flows onto it and connects the wire to the lug (heat it as little as necessary to make the solder flow and hold the wire very still until the solder solidifies).
Next, do the same thing with the pre-tinned red&white wires to the lug marked "TAP".
Then solder the pre-tinned green wire to the "GND" lug.
The bare wire from the JB should be soldered to the back of your volume pot. This will take more heat & time to heat the pot until the solder flows like water, but as soon as it does place the bare wire on it and heat the wire + pot and add a little solder if needed until it flows and connects the wire to the pot...again, hold the wire very still until the solder cools down.

Hope this helps. The key is to use as little solder as is necessary (no blobs or pools of solder). Heat the metal (back of pot/lug/wire) THEN let the solder flow onto it. Remember..."Meat follows Heat".

Good luck.
 
Last edited:
What Guitardoc said. If it sounds funny in the middle position of the pickup selector, you have to swap the black and the green - all others remain.
 
Yes, if it sounds weak/anemic/nasally/funny in the middle position it means that the JB is out of phase (OOP) with your neck pup. If this is the case just do as hamerfan suggested.
 
Ok you guys are awsome.
Thank you so much.
I am a lot less confused.

To answer your question Guitardoc.
Yes, I am using a damp sponge.

Ummmm....my iron does NOT look shiny lol.
​Also...what is a lug?
 
Ok...the pot is now confusing me.
because the way its configured, I only clipped 3 wires.
None of them were attached to either pot.


20221211_035756.jpg 20221211_035805.jpg 20221211_035741.jpg
 
Last edited:
Ummmm....my iron does NOT look shiny lol.

It might have cooked-on oxide coating from using the iron and not properly cleaning and tinning. That coating reduces the heat transfer efficiency and needs to be cleaned off. You can do that by gently using a fine file to get to the bare metal. Then heat the iron and tin it right away. It should now be shiny. While you are using your iron, constantly clean it using the sponge.


.
.what is a lug?

A lug is the connection/soldering point on the circuit board, volume and tone pots, switches, etc.
 
Ok...the pot is now confusing me.
because the way its configured, I only clipped 3 wires.
None of them were attached to either pot.


filedata/fetch?id=6210788&d=1671297896 filedata/fetch?id=6210789&d=1671297896 filedata/fetch?id=6210790&d=1671297896

Because you previous pickups only had 3 wires...white, red and black. The JB has 5 wires...4 colored wires plus a plain uninsulated ground.
Your previous pup's white wire is equivalent to the JB's black wire.
Your previous pup's red wire is equivalent to the JB's red + white wires. This is the connection of the two coils. They were connected together inside of your previous pups, but they are separate in the JB and you will connect them together at the circuit board.
Your previous pup's black wire is equivalent to the JB's green + bare wires. Your previous pup's coil start wire (which is usually grounded) and its pup ground wire are connected together. But the best way to wire a pickup is usually to keep the start wire and ground wire separate...the start (green) wire going to the circuit board and the ground (bare) wire going directly to a ground (the back of a pot).

I hope I didn't just confuse you more. :wink:
 
In most wiring cases the pickup's start wire and ground wire can be connected together with no problems. But especially in wiring where you are switching between series and parallel or out of phase it is absolutely essential to keep those two wires separate. In pickups that have those two wires separate to begin with (as in the JB) you might as well wire them separate.
 
Ok...I'm done.
The soldering to the board isn't too bad.
20221217_220200.jpg

GuitarDoc, i hope I didnt disappoint you bro, but...It's a bit much solder on the board.
well see.

Now the pot. All I can say is....ugh.
It looks bad, real bad.

20221217_220208.jpg

Fuck it. I'm gonna try it.

I put everything back together,
polished the fretboard with

20221219_025156.jpg


Now I'm gonna polish the whole guitar with this...

20221219_025146.jpg

Then the strings...

20221219_025215.jpg
Haven't decided which set to put on yet.
Suggestions???

Btw...I play Metal and Rock.
Seether, Three days grace,Nirvana, Black Sabbath. SOAD. Stuff like that.

I'm plugging it in tonight.
I'll keep you guys updated.

Keep your fingers crossed.
 
Ok...done.

Hell yea!!!

20221219_051308.jpg 20221219_051258.jpg


Sound soooooo much better.
I frigging nailed it.


Well.....almost.
I'm laughing my ass off.
I made a rookie mistake, lol...
I labeled (with a sharpie) the pots wrong.

Oh crap....that means I soldered to the tone pot instead of the volume pot.
How bad is that?
 

Attachments

  • 20221219_051335.jpg
    20221219_051335.jpg
    32.4 KB · Views: 0
Hey eclecticsynergy...Ya know what...those knobs were actually an accident. I wanted something more than just plain black.
I ordered them off Amazon. When I got them, they were huge. I was a bit stunned. I re-checked the listing. It said knobs for stereo equipment.
My girlfriend was like.. "They are.... kind of badass"
I agreed. They are so huge. They just work. Its kick ass looking. I love it.
 
Back
Top