Restoring my Warmoth LP

ratherdashing

Kablamminator
My grandfather was the first person I knew who had an electric guitar, and whenever I went over to his house he'd let me play it. It was a pretty crappy Les Paul copy painted in the same glacier blue metallic as his old Chrysler. He passed away in 2004, and my uncle decided to take the guitar for some reason. This pissed me off a lot, but I realized that if I got it I would only mount it on the wall or something, because it was right handed (I play left).

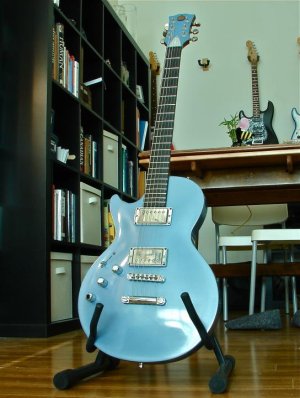
So, in 2005-06, I took it upon myself to build a high-quality, fully playable-by-me version of his guitar. I got a body and neck from Warmoth, and all the necessary hardware and electronics. I decided that since Warmoth didn't offer the colour I needed I would do the finish myself using Duplicolor paint (I was able to find the exact Chrysler color).

When I completed the guitar, it looked pretty much like this:
DSC01443.jpg

Almost immediately I had problems with the finish. The Duplicolor clear coat never fully hardened, and it started to pick up stains and pits. It also bonded to the foam on one of my guitar stands and my wall hangers, leaving ugly black marks on parts of the finish. Due to the crummy appearance and odd feel, it started to become my least played guitar, which was a shame because it sounds great.

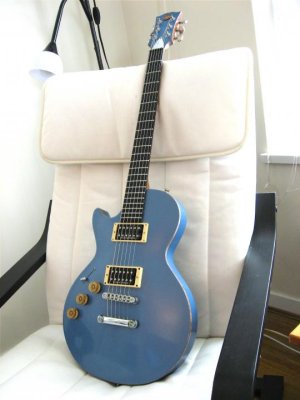
I tried to revitalize it with a light make-over:
IMG_0951.jpg

During this time I got a new Strat and a Gretsch Duo Jet that got a lot more play time than the Warmoth. It didn't even come out of its case for over a year. Then I got my Epi Dot, and I plundered the Warmoth's pickups to go in there.

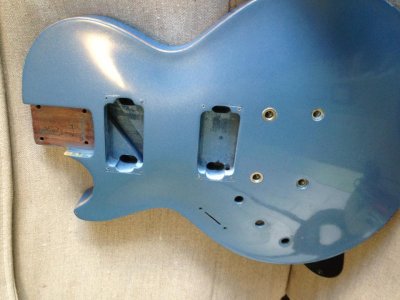
This is what the Warmoth LP looks like now:
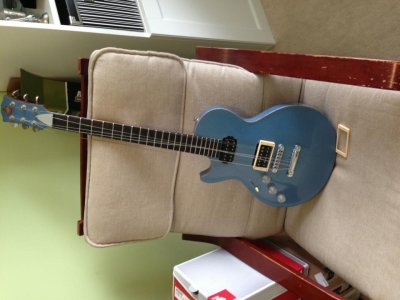
Photo 2013-01-25 10 52 07 AM.jpg

Those are cheapo stock pickups that aren't even hooked up to anything. I was thinking of wall mounting this guitar and wanted something to fill the holes. In its prime it had a PG bridge and A2P neck, both of which are now in my Dot.

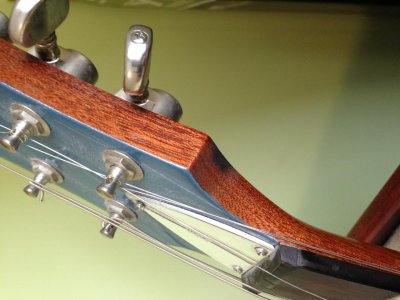
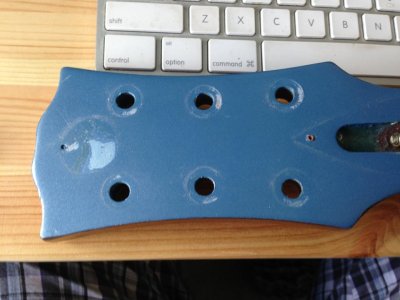
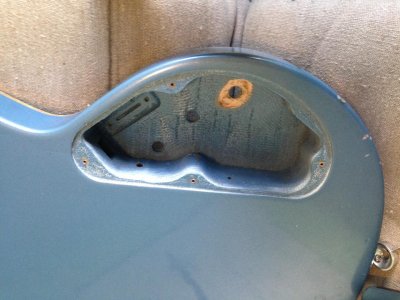
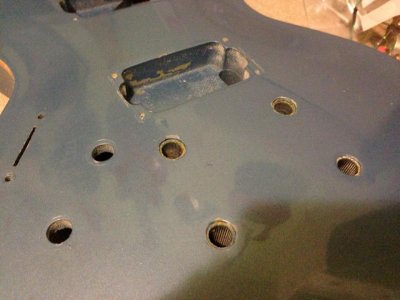
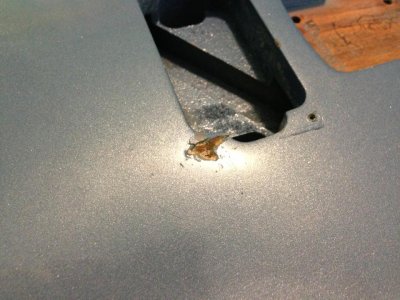
Note the finish damage:
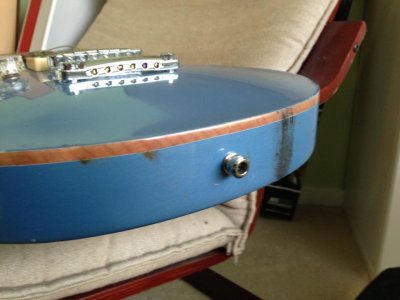
Photo 2013-01-25 10 53 05 AM.jpg

Photo 2013-01-25 10 52 21 AM.jpg

Pretty sad. This was supposed to be a tribute to my grandfather and I've basically let it rot. The truss rod is inscribed with his initials, and the emblem is a Royal Canadian Legion pin (he was a veteran who was actively involved in the Legion).

Photo%202013-01-25%2010%2052%2029%20AM.jpg


This is going to change, starting now. I'm taking this guitar apart, stripping all the old finish off, and starting over from the bare wood. I'll replace any parts that need to be replaced, and make this a guitar that I love and look forward to playing. I've learned a lot since 2006, and I know I can do a better job.

Progress will be posted in this thread.
 
Re: Restoring my Warmoth LP

have fun
best wishes for the journey and satisfying arrival at the destination
 
Re: Restoring my Warmoth LP

One of my favorite Warmoth LPs around (including my own). Looking forward to seeing what it becomes! Also, it would look great with cream or zebra humbuckers!
 
Re: Restoring my Warmoth LP

Weird! the finish on my white hardtail strat also did the same bonding thing with the foam on my guitar stand. I thought that it was something unique to the type of finish I used, but I guess not. I thought about feeling distraught about it cuz it is kinda ugly looking, but seeing as it was a slightly relic'd finish I decided to just accept it. Still though...I kinda wish it hadn't happened.

You gonna redo your LP in the same finish or are you gonna change it?
 
Re: Restoring my Warmoth LP

I remember when you were building this initially, and how (justifiably so) proud you were of it. Looking fwd to the Phoenix rising from the ashes, so to speak.
 
Re: Restoring my Warmoth LP

The foam on guitar stands is BAD BAD BAD for lacquer finishes. I only use my stands with that stuff for gigging or if I'm playing throughout the day at home. The rest of the time the guitars are in their cases. If you want to leave one out on the stand, cover those areas with a soft cloth.

Good luck with the restoration.
 
Re: Restoring my Warmoth LP

I think it looks pretty cool as is, but am looking forward to seeing her in her new pristine glory....I too, love the color!

Cool project with a cool story...Good luck and enjoy!
 
Re: Restoring my Warmoth LP

Well, sorry to those who like the colour, but you won't even recognize this guitar when it's done.

I know my grandpa liked this colour, but I'm not as much of a fan. Lately I've been interested in transparent finishes, and I recall that this guitar has a very nice flame under that paint.

The plan for the top is a blue dye. It won't be a burst or a dramatic grain-enhanced flame like a PRS though - just a nice medium blue throughout. I'll do the masked "binding" effect again because I really like that. Back and sides will either be natural mahogany, or black paint.

For the neck, I'll go with an oil finish on the back, and black paint or dye on the headstock.

Both the body and the front of the headstock will get a urethane clear coat from pinto79's paint person, which means I have a bit of a deadline to get the stripping and colouring done ... they will be shooting the clear at the same time as my Lockwire.

For pickups, I'll be getting a Custom for the bridge and an A2P Slash for the neck, both zebra. I really dig the look of zebras on a flame top LP.

Hardware will likely be unchanged. I will either keep the clear knobs that are on there or do amber knobs. I am pondering a replacement of the TOM but that is a maybe.

I'm pretty excited, because this will be like getting a whole new guitar for me, one that I already know I will love.

I have some progress pics to post tonight, and I will see about doing a mock-up of the finished product.
 
Re: Restoring my Warmoth LP

TBH I found the original color scheme to work really really well but if you're not cool with it then that's that.

I really do love seeing the grain of a guitar unless it's REALLY ugly which is why I would probably just go with a dyed top and a clear back and sides. Easier to do the natural binding too.
Headstock could either be matched to the top's color or black, both will look good.

I really REALLY love the chrome pu rings and for zebra, the EVH style is my all-time favorite.
Here, just to give you a visual:
manos12028large29.jpg
imag0080xy.jpg
 
Re: Restoring my Warmoth LP

First step is, of course disassembly.

The finish really glued itself to a lot of parts. I will need to take some time to scrape paint chips off some of the hardware. The legion emblem came off nicely with an x-acto knife though.

Photo 2013-01-25 1 22 16 PM.jpg

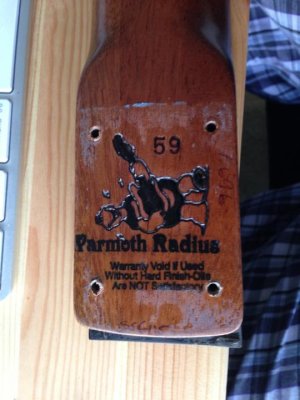
Haven't seen this in a long time. "59" refers to the '59 Roundback neck profile. There's also "SS6115" written on the bottom (the fret size) and I assume "1.696" is the nut width.

Photo 2013-01-25 1 23 00 PM.jpg

Body is next ...
 
Re: Restoring my Warmoth LP

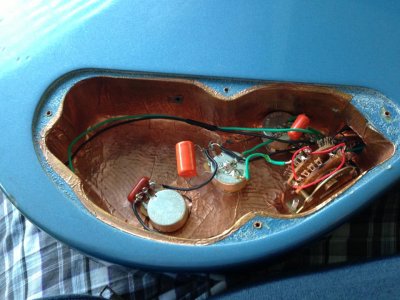
The pots and switch are all in good shape. I am changing the wiring scheme as part of this overhaul though.

Photo 2013-01-25 12 28 06 PM.jpg

Control cavity gutted. The football-shaped route was originally put in to accommodate a six position rotary switch wired as a sort of Vari-tone. That didn't last long.

Photo 2013-01-25 12 38 37 PM.jpg

Everything but the bushings removed. Those were a total pain in the ass.

Photo 2013-01-25 12 38 47 PM.jpg

Got them out using the method shown here.

Photo 2013-01-26 5 26 37 PM.jpg

Last task was to get a mounting ring screw out whose head broke off. I tried everything I could come up with ... eventually just had to dig it out. Argh... Oh well - that part's under the mounting ring anyway.

Photo 2013-01-27 10 19 17 AM.jpg

Body and neck are now both ready for sanding.
 
Re: Restoring my Warmoth LP

Replying here to wish you luck, send encouragement, state that I have always thought this guitar was the crazy sex pants, and subscribe to this awesome thread.

Carry on.
 
Re: Restoring my Warmoth LP

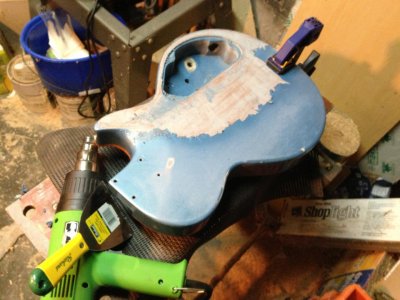
Got started on the finish removal today, a.k.a. "Operation Crudscrape".

Trevor kindly let me use his workshop and heat gun. I'm very glad I got to use the heat gun - probably saved me a few hours of sanding. The lacquer just melts off like caramel.

The progress in this pic took about 5 minutes:

Photo 2013-02-02 4 41 43 PM.jpg

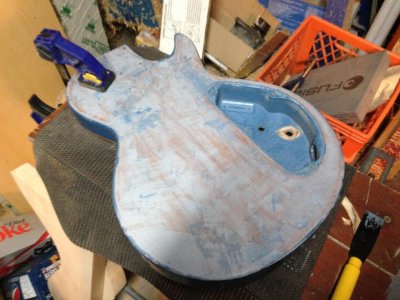
The back was easy on the whole. I'm not going to bother with the control cavity.

Photo 2013-02-02 4 53 22 PM.jpg

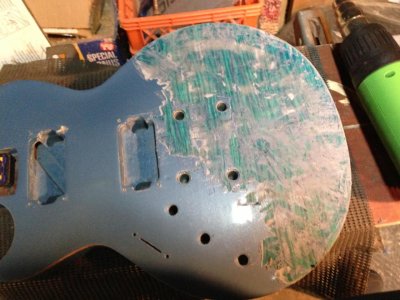
When I started heat-gunning the top, I got a bit of a surprise:

Photo 2013-02-02 5 04 10 PM.jpg

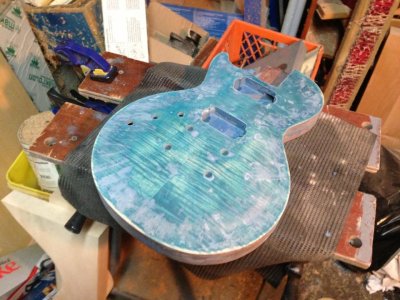
I forgot that I had originally done a dye finish on this guitar! As I recall, I attempted some kind of weird burst involving the ice blue metallic paint, decided it looked terrible, and just painted the whole thing solid. Now that I see that flame I'm absolutely gobsmacked that I ever thought it was a good idea to do a solid colour on this guitar! That said, I am not really a fan of the dye colour I chose back then, so I'll have to sand that down and start over.

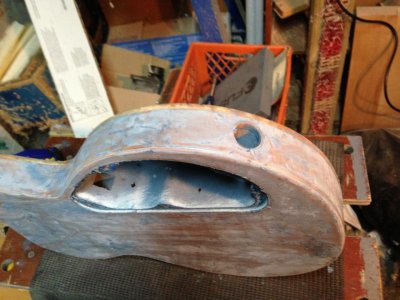
The top was much harder to scrape because of the contours, but I got the bulk of the crap off. Here's the side view after the ol' bake-n-scrape.

Photo 2013-02-02 5 52 14 PM.jpg
 
Re: Restoring my Warmoth LP

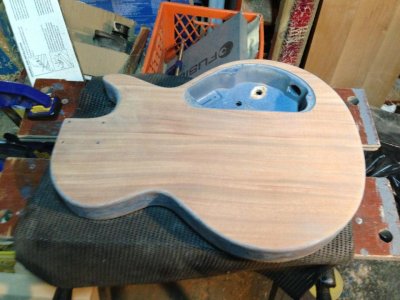
After the heat gun did its job, sanding the back with my power sander took just a few minutes.

Photo 2013-02-02 6 01 52 PM.jpg

There's still primer buried deep in the pores of the mahogany, so I'll either have to use some kind of chemical stripper to get it out, or just keep sanding.

The top is a lot harder to sand, of course, but I did make some very good progress.

Photo 2013-02-02 6 02 02 PM.jpg

It seems like the finish is thicker on the top. Probably because I put a buttload of primer on there to cover up the dye.

That's all I had time for today. My goal is to go back to Trevor's tomorrow and get 99.99% of the finish off by the evening, including the neck (which I'm sure will be much more difficult).
 
Re: Restoring my Warmoth LP

Why don't you have a luthier do the paint job man?

I have a guitar in metallic blue just like that, newly finished. Initially it was metallic green but the paint couldn't cure completely cause of the multiple elements of colors required to achieve the metallic green color. The luthier had even incurred loss on his part cause of the repeated failures. So we decided to go with metallic blue, which was pretty straight forward to achieve. I'll post pic if I can get a camera.
 
Back
Top