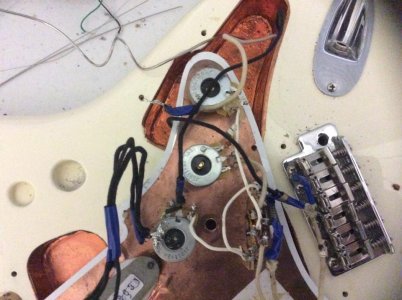
Solder not sticking to the Pot, Help!

Re: Solder not sticking to the Pot, Help!

I usually keep the tip tinned and tin the location I'm going to solder to. Haven't had a problem in 15 years of soldering pots. But maybe I'm a noob.
 
Re: Solder not sticking to the Pot, Help!

Make sure to sand the spot that you are soldering.
 
Re: Solder not sticking to the Pot, Help!

I ve ran into this problem and it was the solder tip that was the issue.
It's got too much build up on the tip and that's not conducting the heat properly to the tip to heat the pot well enough. You can either lightly sand the tip with super fine steel wool or paper. Or buy a replacement tip. If sanding be super careful because u don't wanna sand through the coating on the tip.
 
Re: Solder not sticking to the Pot, Help!

Does the pot have a solid metal back? I have some 250k CTS from warmoth (purchased a decade ago) with a back that has a hole in it with visible plastic. It is virtually impossible to solder to.
 
Re: Solder not sticking to the Pot, Help!

the pot does have a hole in the bottom but i'm not exactly sure if it is the same as yours

Oh, is there white plastic in the center of the hole with the metal just a ring around the outside? Or is it just a hole where the pivot/rod for the wiper comes through the back, like is it a 'dished back' pot?
 
Re: Solder not sticking to the Pot, Help!

I would rough up the sides and not solder to the back. There's a big risk of dropping solder into that plastic area and messing up the works.

The other option is to not use the back as a ground plane and only use the lugs, and maybe a 'star' ground - a screw or location point where all the grounds come together that isn't a component in the wiring. Fender does this, at least on MIM guitars.

That might be the best way IMO.. Even though I do solder on the back unless its a DPDT, then its on the side.. The "star" method is used on most my guitars with good effect..
 
Re: Solder not sticking to the Pot, Help!

Edit - those are no-name pots, not CTS (or if they are they are the crap end).

Dump them. These are garbage and the best thing you can do is get real pots as these won't accept solder fullstop.
 
Re: Solder not sticking to the Pot, Help!

Edit - those are no-name pots, not CTS (or if they are they are the crap end).

Dump them. These are garbage and the best thing you can do is get real pots as these won't accept solder fullstop.

I have some just like this with cts markings. Toss 'em.
 
Re: Solder not sticking to the Pot, Help!

Edit - those are no-name pots, not CTS (or if they are they are the crap end).

Dump them. These are garbage and the best thing you can do is get real pots as these won't accept solder fullstop.

Those look like CTS to me. I did a special run of long shaft blend and concentric pots a couple years back and I learned that the open back is the default casing for CTS. You have to special order a solid metal casing. All those CTS guitar pots we commonly use had to be specified to use a solid metal casing.
 
Re: Solder not sticking to the Pot, Help!

yes, the iron is 60w. I actually finally ended up getting the solder to stick. I made a simple modification so it would stay on there. I'm going to test it out tomorrow to see if it works.

Cheers :D
 
Re: Solder not sticking to the Pot, Help!

Soldering was my chore when I was a kid; Dad was a ham radio operator/restorer, so I did simple stuff for him for pocket money. The quick trick I found was to use a few simple steps. First, check your soldering tip and make sure that it's not corroded (rusty or greenish deposits, pock marks, gouges or anything like that) and verify the wattage of your iron. If your tip is damaged, no worries. Weller tips are about 7 bucks for a 3 pack at the hardware store and super easy to install. Second, like the other guys said, clean and scuff your soldering surface. Third, "tin" the tip, the wire. This means melting a very small amount of solder onto the tip by touching the solder with the tip of the iron, taking that solder and applying just a little to the last bit of the wire that you're going to attach to the pot. Now lay the iron on your scuffed pot area with the beveled part of the end making contact and hold it there for about 4 seconds for a 60w iron (it is possible to damage a pot by overheating). You'll know it's hot enough by touching the solder to the pot as close to the iron as you can without touching the iron and melting solder to the surface of the pot. When you've applied solder to the joint, you'll need to remove the iron but be sure to keep the wire held in place until your joint cools (3-4 seconds; blow on it), i.e. don't use the iron to hold the wire down because it'll move when you pick up the iron and you'll be back to square one, only with a mess. That's pretty much all the places where you can make a mistake in this type of soldering if you're new to it. Probably a bit lengthy, but it's equally easy to do right or screw up.... Good luck and remember to plan your moves out, draw your circuits and take your time. Building circuits is actually pretty fun.
 
Back
Top