

 Tweet
Tweet
Sorry for the delay in getting this to you folks. I was just a little impatient in getting what I could out there to show off a little of what I had done.
THIS is the cool part IMHO.
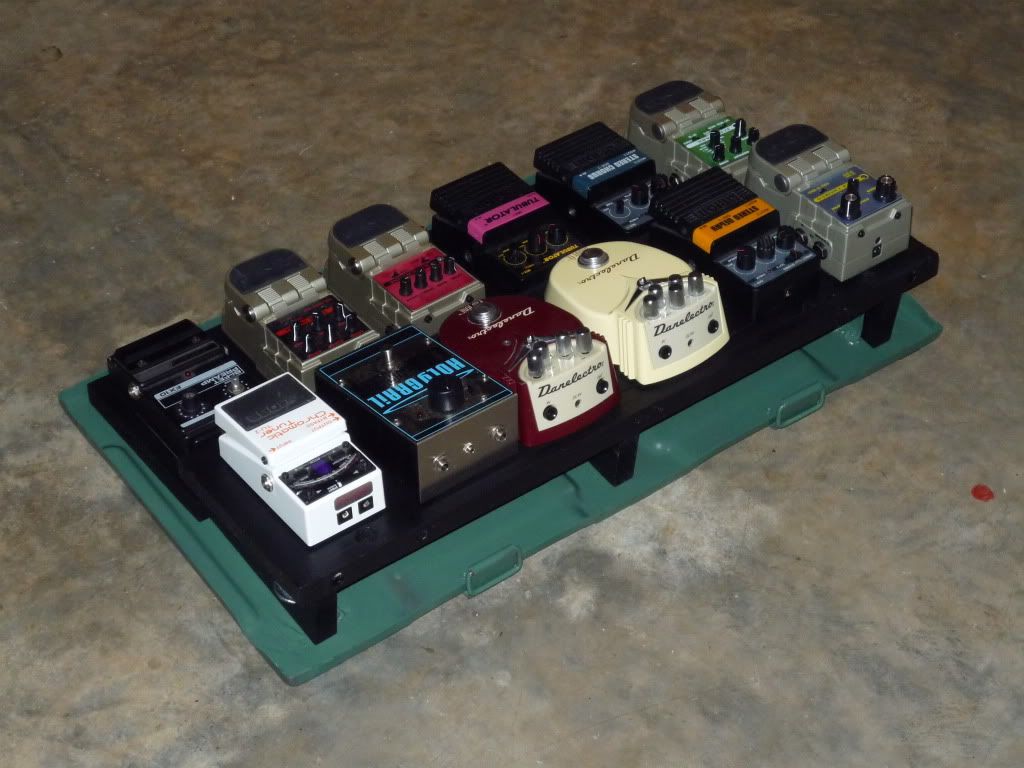
Still not all that cool yet is it...
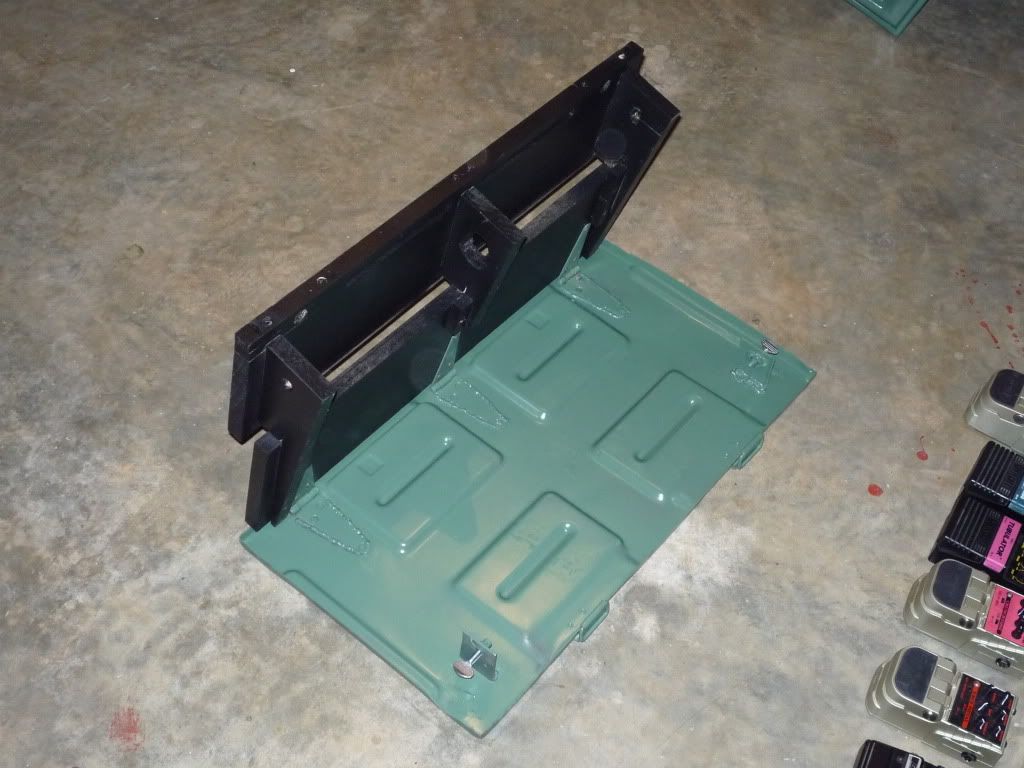
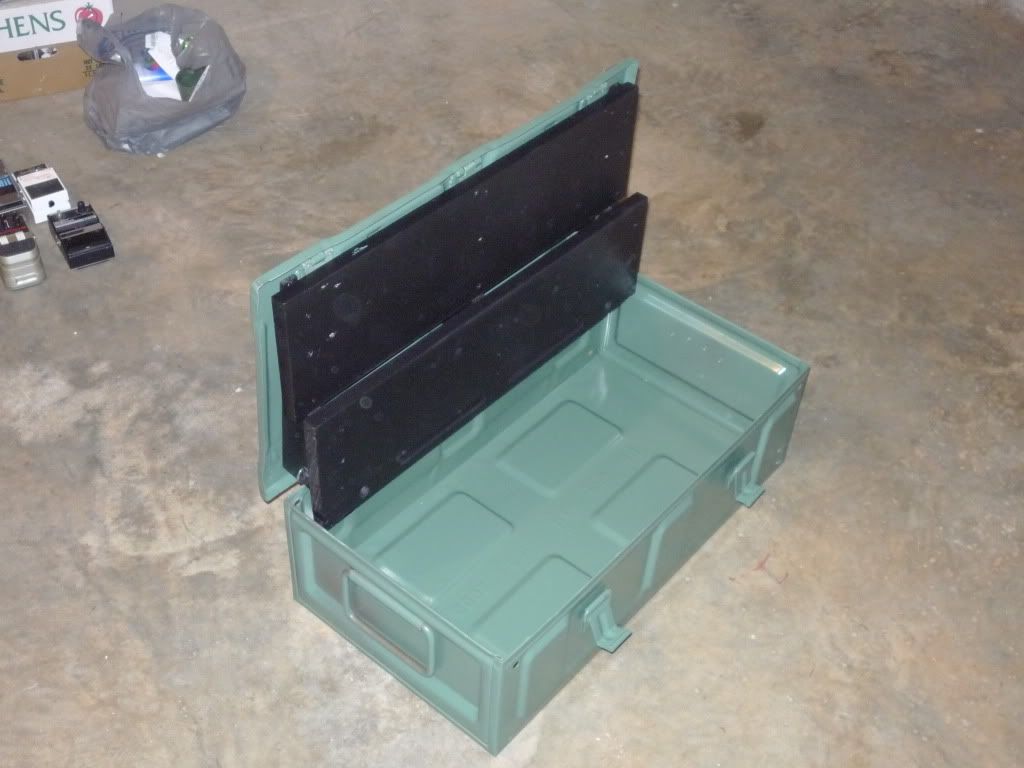
See how the pedal board is mounted on hinges that have been welded to the lid that allow easy access to the wiring underneath the pedal board. There are two thumb screws that thread through the holes in the sides to fasten the back section of the pedal board to the case. I wanted everything to be readily accessible without needing tools. This is one of my favorite features about my creation.
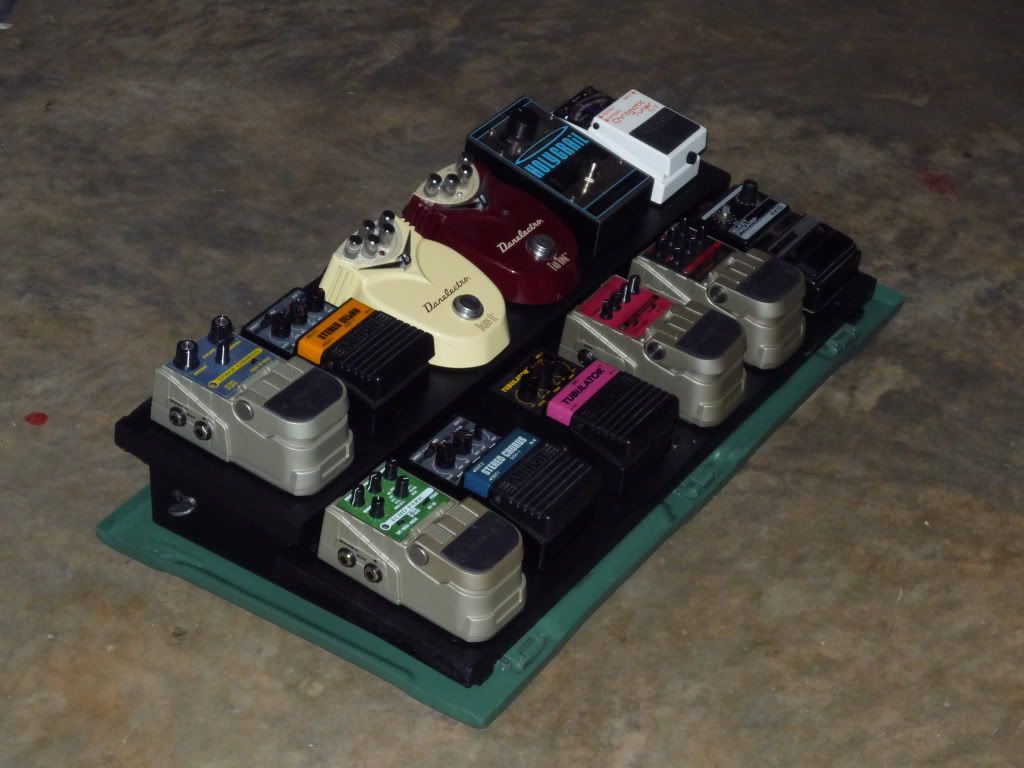
Now doesn't that look nice? It's all sturdy looking and the case is made of stamped steel. It's not featherweight, but it's not all that heavy really.
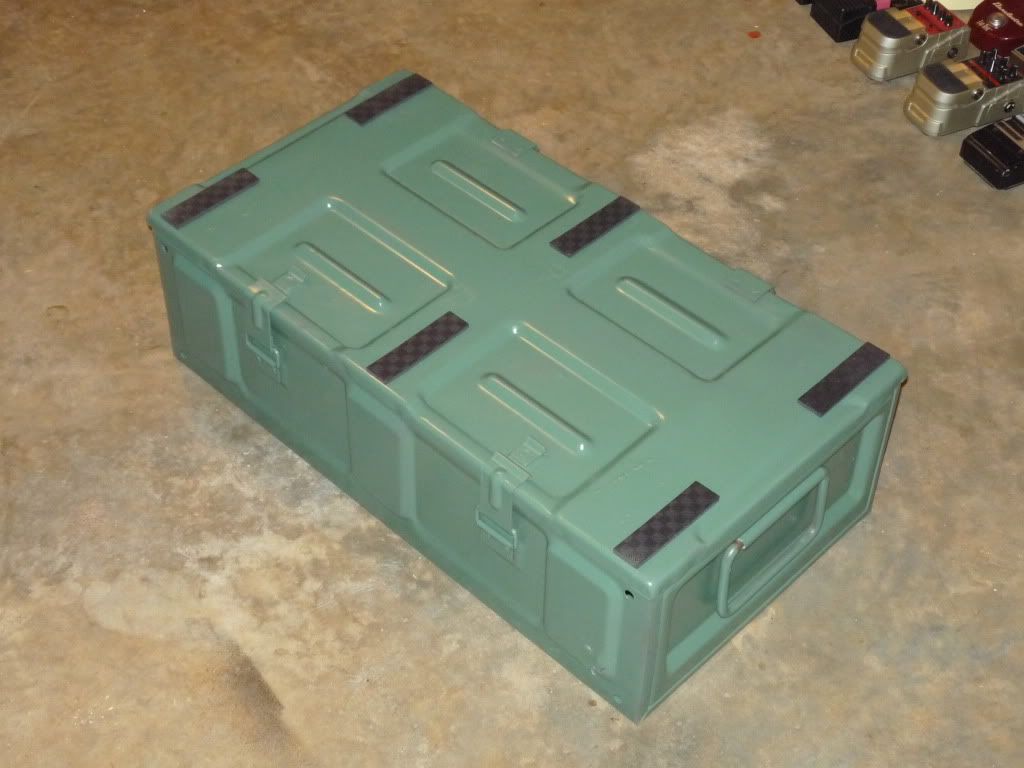
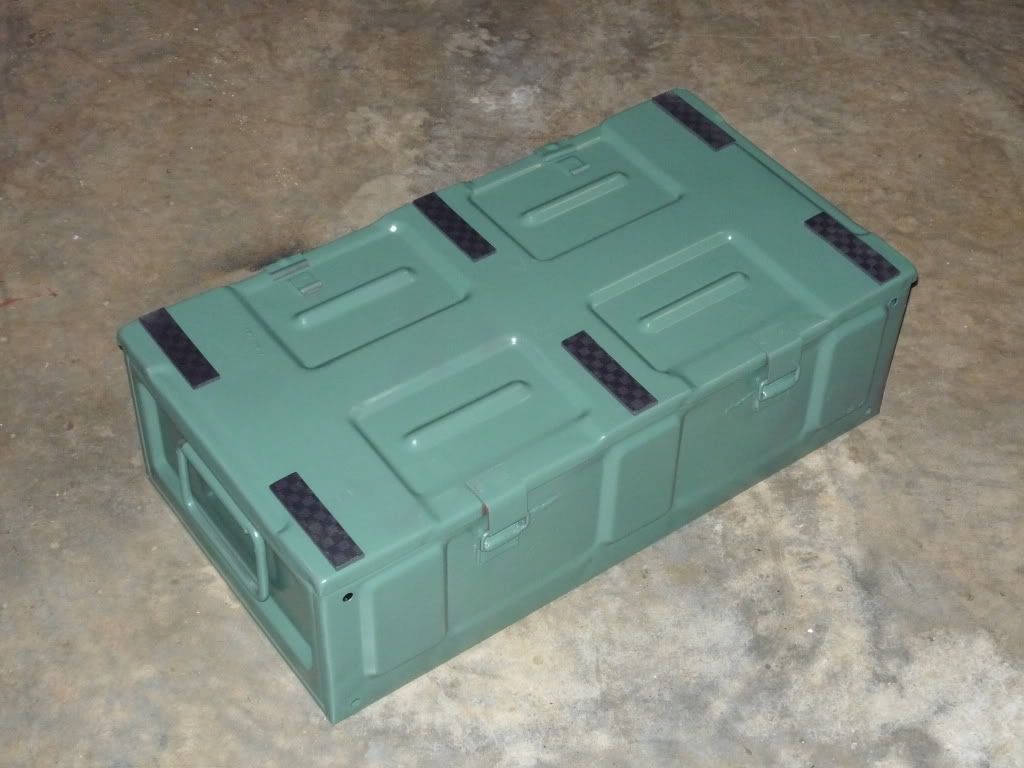
Here it is all buttoned up and secure. Note the non-skid rubber pads on the bottom of the lid to keep the pedal board from skittering around when I step on it.
I had to make the rear hinge removable to make all this workable. It wasn't all that difficult as a little loving from the welder and subsequently the grinder (it's tough to get that welder dialed in on thin-ish steel) to smooth the ugly welds out a bit
And now you know....
.....the rest of the story.
THIS is the cool part IMHO.
Still not all that cool yet is it...
See how the pedal board is mounted on hinges that have been welded to the lid that allow easy access to the wiring underneath the pedal board. There are two thumb screws that thread through the holes in the sides to fasten the back section of the pedal board to the case. I wanted everything to be readily accessible without needing tools. This is one of my favorite features about my creation.
Now doesn't that look nice? It's all sturdy looking and the case is made of stamped steel. It's not featherweight, but it's not all that heavy really.
Here it is all buttoned up and secure. Note the non-skid rubber pads on the bottom of the lid to keep the pedal board from skittering around when I step on it.
I had to make the rear hinge removable to make all this workable. It wasn't all that difficult as a little loving from the welder and subsequently the grinder (it's tough to get that welder dialed in on thin-ish steel) to smooth the ugly welds out a bit
And now you know....
.....the rest of the story.


 So are the pedals upside down in there or do you flip the whole unit?


Comment