You are using an out of date browser. It may not display this or other websites correctly.
You should upgrade or use an alternative browser.
You should upgrade or use an alternative browser.
A bad decision has been made
- Thread starter blakejcan
- Start date
ICTGoober
Well-known member
Lacquer won't cut some finishes - polys and so on. Start on the bare wood and then try some out of the way spots to see what happens. Otherwise, be judicious with your wetsanding, using wet or dry papers and a bowl of clean water with a drop or two of hand soap in it to keep from loading the paper. Stop and wipe often. Begin with 1000 grit and work down until you see results. Besides, your new finish might not want to play with the old finish. You'd have to strip bare, then.
blakejcan
Well-known member
I think we have our wires crossed.
I just want to carefully remove only the top layer of clear. I don't want to risk taking off anything original underneath if I can help it. Playing with laquer thinner would be my last choice unless to your point, I wanted to just wipe everything off and start over. Which might also be an option just to get it to be a bit more uniform.
Bigger and more immediate question---how much of the back of the headstock/neck should I shave off for the backstrap?
ICTGoober
Well-known member
You could trying buffing off the clear finish with something that has a little cut to it - like white Meguiar's paste. Use a lint free cloth, keep the cloth wet, and clean it all off now and then to check your progress. I'm talking by hand - not with a machine.
On the backstrap, whatever you feel comfy with. At least 2 layers of veneer on the back, maybe one on the front? Less than 1/8" overall.
On the backstrap, whatever you feel comfy with. At least 2 layers of veneer on the back, maybe one on the front? Less than 1/8" overall.
Last edited:
Heavens NO! Don't use lacquer thinner! Scrape and/or sand until you've got that refinished clear off. You could test a small spot to see if the top layer reacts to lacquer thinner and if the original finish reacts to it. If the top finish does but the original does not, then go ahead with the lacquer thinner (but I suspect that it is just the other way around).
blakejcan
Well-known member
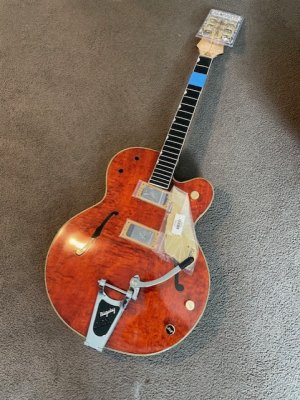
OK. I gave this a breather for a bit and now I'm back to making some progress. Here's where I'm at.
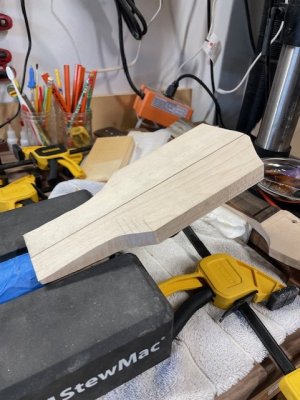
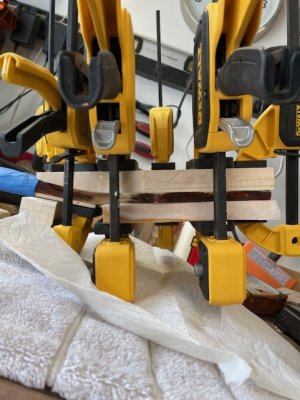
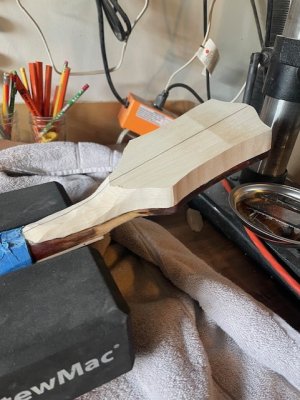
I got a fresh maple neck blank and sliced a fine walnut strip and spliced them all together so as to match the back of the headstock. This was then sanded down to become the backstrap that would extend from around the 2nd fret give or take all the way up through the headstock in one big, strong piece.
I started sanding it. And sanding it. And sanding it. And shaping it. And sanding it. Sizing it. Sanding it. Shaping it. Sizing it again.
Ooops. Angles were off. Start over. From scratch.
2nd try. Same thing. Made a new piece, also got a fixed belt sander and learned from my mistakes the first time and now I have it 99% sized up with only the tiniest of gaps left. Hoping that by this weekend I can actually glue on the backstrap and get down to actually shaping it down to look like a guitar again.
What's interesting is that most of the headstock break and/or backstrap videos you can find online are of course on Gibsons with mahogany necks. I get it. The neck angle makes this happen, it's real thin in parts and mahogany can be soft.
On the Country Gent.....all the same problems exist EXCEPT the neck is maple. Maple is freaking strong. And hard. Or at least this backstrap piece I'm putting together. This either hit at just the right angle, was very very thin originally or someone really slammed this down to break it. I don't know.
All that to say, I can't say I am 1000% confident that this will be perfect but I do know that if I can do this next step correctly I'll have a real fighting shot at getting a fully functional instrument with a long lasting repair.
blakejcan
Well-known member
Tragedy. I have the backstrap fully ready to go, I size it up and I push on the very gingerly attached headstock and ..........it just pops right the F off. Haha. Lord.
Supposed I didn't quite clear out all of the previous glue when I slapped this back together the first time. Plan stays the same, glue the headstock back on and add the backstrap. There is just so much missing wood and so little attaching everything that when the backstrap is put in it should be enough to hold it all together. Better now than later I guess.
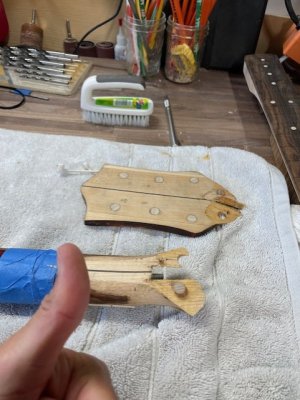
Supposed I didn't quite clear out all of the previous glue when I slapped this back together the first time. Plan stays the same, glue the headstock back on and add the backstrap. There is just so much missing wood and so little attaching everything that when the backstrap is put in it should be enough to hold it all together. Better now than later I guess.

ICTGoober
Well-known member
Heavens NO! Don't use lacquer thinner!
I hadn't noticed you were still clutching your pearls over my posts. I assumed by now that Blake has the brains to test anything like this in a small, un-noticeable spot FIRST. No one expected him to soak a rag with thinner and just slather it all willy-nilly over the guitar. Give me a break.
blakejcan
Well-known member
got plenty to work with there
haha yea, better than not enough? Wanted to give myself lots of room to screw up.
Similar threads
- Replies
- 18
- Views
- 3K

