Finishing question - cherry red on mahogany 335 and filler recommendation style

ThreeChordWonder

New member
My rattle can skills are abysmal so the plan for the 335 kit I received yesterday is either natural mahogany with wipe on poly over or cherry red then wipe on poly over.

Can anyone recommend a wood stain that will give me that Gibson cherry red look?

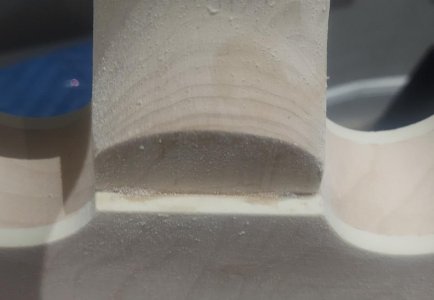
Also, can anyone suggest a wood filler that will go into the gaps in the neck joint, sand to a fine feathered edge and take stain?

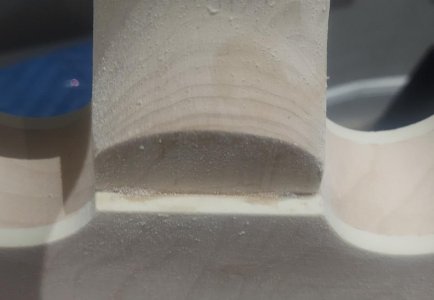
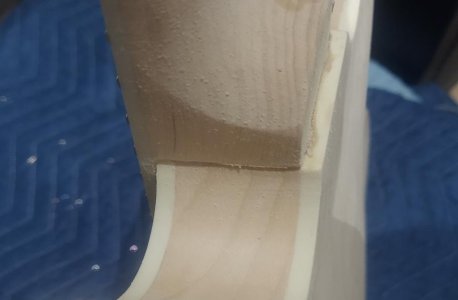
I glued the neck in pretty much dead straight but the joint isn't exactly air tight down the sides. If I have to use Bondo I will probably end up staining the edge of the body black to mask it, which I don't want to do if I can avoid it.

Pictures tomorrow.

Thanks in advance.
 
Do it right. Remove the neck properly, and reglue it at the correct angle. Gaps are not acceptable. Filler usually does not take stain well.

An easy stain to use are Keda Dyes, which I buy off Squeebay.
 
A bit late for that. The glue is set.

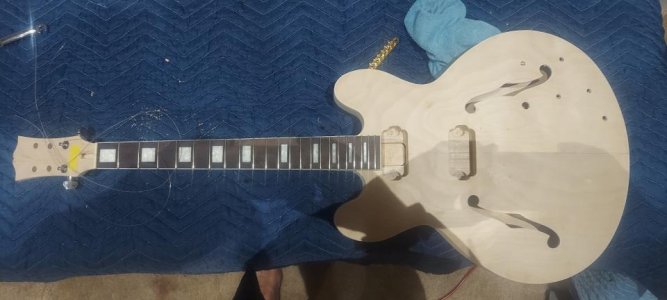
The fit on this Chinese kit wasn't all round good to begin with. Either the neck too small or the pocket was too wide to begin with (take your pick) with gaps either side regardless. It's set back as far as it would go, so the gaps are just down the sides (like you get with Fender necks) and my priority was getting it straight and central.
 
Photos:

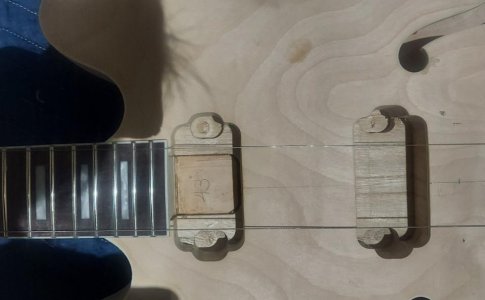
I used a straight edge and strings stretched from the nut to check neck straightness.

20221001_055017.jpg 20221001_055002.jpg 20221001_055039.jpg 20221001_055053.jpg
 

Attachments

  • 20221001_055039.jpg
    20221001_055039.jpg
    41.7 KB · Views: 0
  • 20221001_055039.jpg
    20221001_055039.jpg
    41.7 KB · Views: 0
This looks more than crude. After you found the right angle you have to rework the wood joints with scraper, files and then sandpaper. Watch YouTube instructional vids, I also remember a vid about Gibson Memphis Factory which showed the joining process there in-depth.
 
It's not as bad as it looks TBH. With the gift of 20/20 hindsight, yes, I could have fettled the neck faces better, but what's done is done.

There's no gap where the back of the neck meets the body and no gap, just a step I've sanded back, on the bottom where you would feel it more than see it. Just a mm or so gap to deal with on the top where you would see it more than feel it if you get my drift.

Gibson has the benefit of really good CNC machinery, Their programing is perfected. I saw the vid a while back and it says their necks are made slightly oversize so they have to be hand finished for a perfect fit. By craftsmen trained on the job, perfect tools and perfect working spaces. I have none of those, just a cheap Chinese kit, nor a $3000 budget.
 
Last edited:
A bit late for that. The glue is set.

Unless you used super glue or epoxy, the neck can be removed. Luthiers do it all the time. The neck is SUPPOSED to be removable even when it's been glued in. Hopefully you used a yellow woodworkers glue like Titebond.
 
What wood (sorry) you use to unglue the joint?

A problem I have is alignment. The body didn't come predrilled for the bridge, so I either have to fit the neck and align the bridge to the neck or fit the bridge then align the neck to the bridge.

I suppose I cood (sorry) fit the bridge now, with the neck aligned as it is, and hope there's enough adjustment on the saddles, but...
 
Last edited:
Scrape and sand the joints until there is no more glue residue and see just what you have left. It may not be as bad as you think. Any remaining gaps can be filled a number of ways with different fillers depending on what you end up doing for your finish.

Most guitars are not actually stained, there is color added to the first few coats of the clear finish. This is what I'd recommend for your guitar. When these guitars are glued at the factory they are done under pressure and the glue gets "stained"/saturated into the wood. That can't be sanded out totally and if you stain your guitar you will end up with a very splotchy job (the glue does not accept stain). Also, most grain fillers will not take the stain the same as will the natural wood.

One way to take care of this is to use super glue to fill in the remaining gaps left after your initial sanding. Scrape/file/sand smooth. Sand your entire guitar up to 320 grit (150-220-320) then use a vinyl sealer...3 coats, sanding lightly with 320 between coats. Spray thin coats of StewMac's Cherry Red (https://www.stewmac.com/luthier-too...ains/colortone-tinted-aerosol-guitar-lacquer/) until you get the desired depth of color you want (these sprays are transparent colors, easy to work with. Then finish with your desired clear coats, either lacquer or poly.

If you don't want to buy the red from StewMac (or other supplier) you can buy stain to add to the poly, but if you don't spray on the color you will get a very splotchy finish.

This can be a very fun and fulfilling job. Don't get stressed about it. Just enjoy.
 
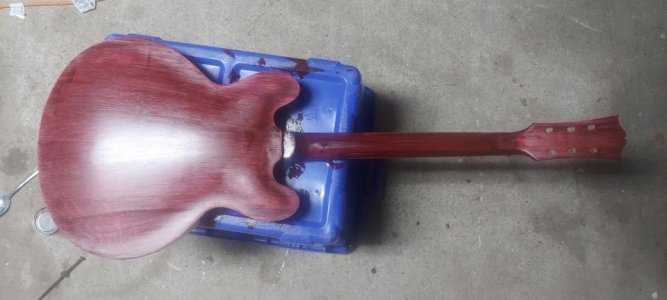
Went with Varethane oil based stain in "cabernet". So it may turn out more "wine" than "cherry", or just drive me to drink, but so far so good.

I put two coats on in quick succession, then allowed that to soak into the wood and dry overnight. I then sanded the excess off completely, leaving only that which had soaked into the grain behind. The third, hopefully final, coat has just gone on to even out the color.

Photo with still wet stain.

20221002_153352.jpg
 
It's still a beautiful colour. I think it could look great. Did you fill the "issue" spot with anything yet?
 
Unique - being the only one of its kind; unlike anything else.
"original and unique designs"

So if something is unique how can something else be more unique?:smack:
 
It is unique because you decided to build it and finish it yourself.
It is more unique in that it is an uncommon color. I said what I said.
 
Back
Top