It Might Get Loud!

ThreeChordWonder

New member
Incoming!!!!

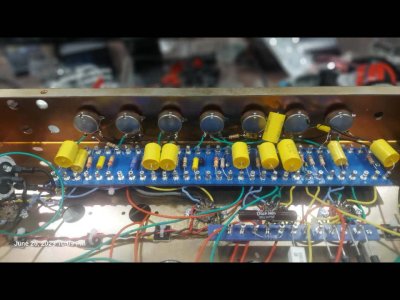
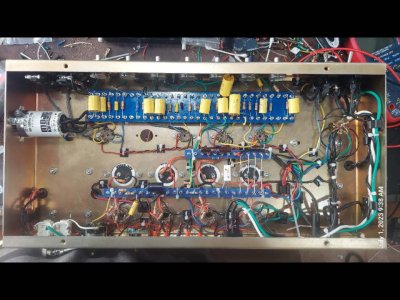
Mojotone Custom 100 kit, which I am led to believe is a Hiwatt 103 " tribute". $829 including Fedex, excluding the case / cabinet / call it what you will, which will be bought later.
  • 100 watts RMS
  • 4 X ECC83 and 1 x ECC81 in the preamp stage
  • 4 x EL34 in the power amp stage
  • Fixed bias
  • Diode rectifier
  • 2 channels, "Normal" and "Brill", both with a high and low input, jumper-able
  • Independent volumes / gains for each channel
  • Master volume
  • Usual 3 tones plus a Presence knob
  • Switchable speaker impedance
 
Good job I'm a bit "mutton Jeff" then, from all those early 80s Motorhead etc. gigs, down the front, head stuck in a speaker bin, evenings. :-).

I'll probably end up with an attenuator though :-(
 
If you want to know which hiwatt ampli was used as blueprint, compare the tonestacks. The DR 103 has a certain tonestack which makes his signature sound.
I have this sound on my pedalboard. It's a clone of the Catalinbread RAH
​​​​​​
 
Last edited:
Wow, that looks great! I've built a few pedals, but I don't think I am confident enough to do an amp.
 
Wow, that looks great! I've built a few pedals, but I don't think I am confident enough to do an amp.

Helps if you have a decent knowledge of how the thing is supposed to look and work. Strip away all the volume and tone controlsand the basic circuit is pretty simple. Watch a few youtubes on how tube amplifiers and the tubes themselves work. Then it's just a big lego set. Just follow the instructions. Check every component with a digital multimeter before you fit it, then again at the posts after soldering to check for dry joints. If you have components left over, figure out why. Go over everything three or four times when you're done.

Current schedule I should be able to power the thing up this weekend. I'm starting with a variable AC power supply and an 8 ohm / 100 watt dummy speaker resistor just in case.
 
Last edited:
Well, I bet it will be very cool. The Hiwatt sound isn't a common one these days, but one I've always liked.
 
Scored a line 6 plywood 4x12 today. Bit scuffed up and I have no idea what drivers are inside, yet, but for $150 I'm not complaining.

I got it home, put some castors on it, and hooked it up to the Origin50. So far so good, and even the Origin sounds way better hooked up to a proper 4x12.
 
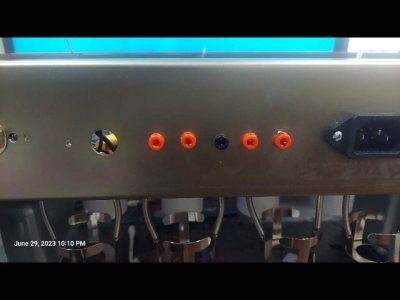
I added four plate voltage probes, one from each. EL34 socket pin 5, plus a ground on the back wall. I used a spare hole and positioned a trim pot behind it (after this pic was taken - its in the big hole to the left of the probe). Now I can bias the thing without sticking multimeter probes (or fingers) inside the guts of the thing. MUCH safer.

Hiwatts apparently got/ get biased by suck it and see changing out of out a single 4.7k resistor. You cant bias individual tubes or even pairs, just get the closest you can across the spread. I suppose you could try musical chairs with the tubes aftrr that.

On the advice of someone on the Marshall amps forum I left that 4.7k alone. Instead I relocated a 47k downstream of it to pice of prototyping board and put a Marshall 0-50k in series with it and ran wires back to the posts where it should have been soldered.


20230629_221021A (1).jpg
 
While the wife was out shopping this morning, I took the opportunity to go through the circuit one more time. This time with a multimeter, a spare 11x17 copy of the circuit diagram (they're download able in pdf format) and a highlighter pen. Up until now I've been working at my desk with the diagrams on computer monitors in front if me. I checked every component and every wire connection, highlighting off what was good, marking up what was bad.

I found one missing resistor, three I needed to de-solder to check their values (they were okay), and one capacitor that came unstuck. All rapidly fix-able.

Unfortunately (or fortunately, depending on how you look at it)I also found three capacitors I had hit with the side of the soldering iron, and those need to be replaced. I ordered replacements from an eBay seller up north, but with the 4th of July coming up, I don't expect to have them until next weekend.

Still. This proves the mantra of checking, checking what you've checked, waiting a day or two, re-checking everything again twice, then doing the paper copy and highlighter pen check.
 
I would imagine how frustrating this sort of thing would be if you didn't have the good habit of checking and rechecking.
 
Better to find the one's you hit with the iron by inspection.

Yup. And I think if I was doing this build again, I would do all the resistors along the bottom layer, then the wires on the back of the board, check everything out (probably two or three times). then do the caps along the top layer.
 
Back
Top