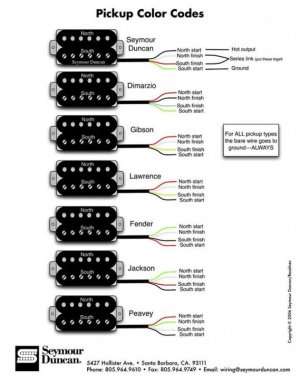
Re: 'Partial' coil tap/split experience..
Thanx, but i already have a spare 25k pot that i want to use. Still not sure if i should cut the carbon ring inside the pot on the grounding side or the spare lug side to get no load so that the bucker is at full strength...
You could just use a blend pot, which works exactly the same as what you are trying to do.
Thanx, but i already have a spare 25k pot that i want to use. Still not sure if i should cut the carbon ring inside the pot on the grounding side or the spare lug side to get no load so that the bucker is at full strength...